Webhooker
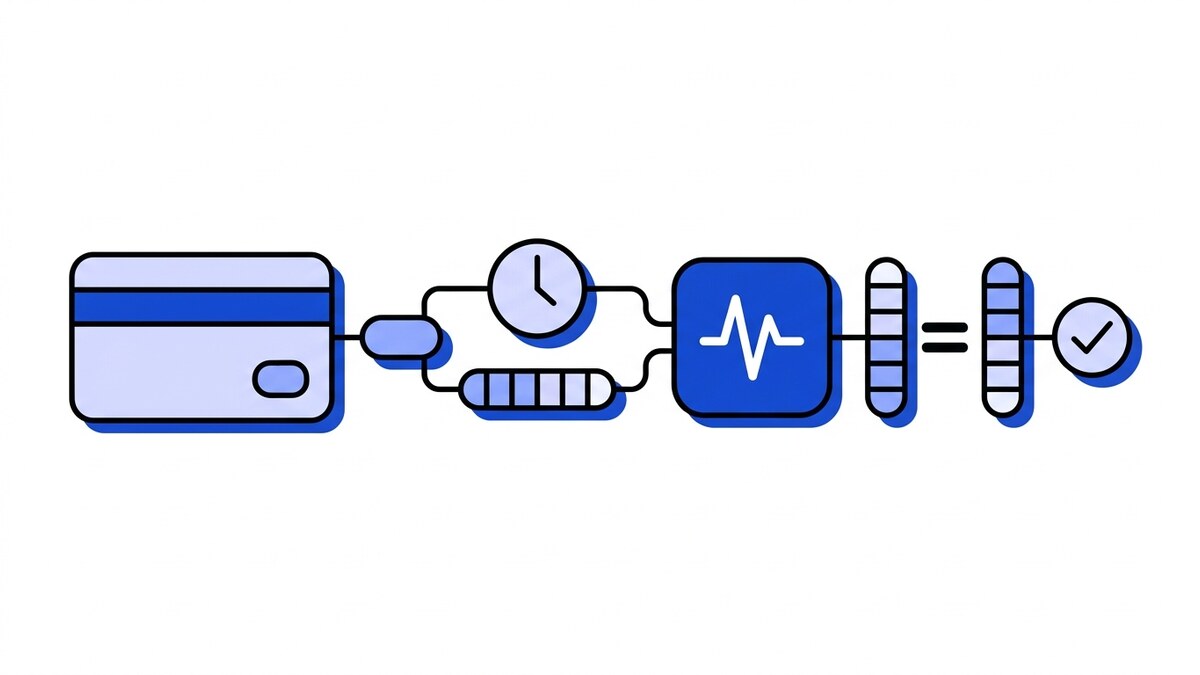
Stripe signs every webhook with a Stripe-Signature header that carries a timestamp and an HMAC-SHA256 signature computed over the timestamp and the raw request body, keyed with your endpoint’s signing secret. To verify it, recompute that HMAC over the exact bytes you received, compare it in constant time, and reject anything outside Stripe’s timestamp tolerance. For the delivery side, which events to handle, how retries and duplicates behave, see the Stripe webhooks guide.
How Stripe signs a webhook: the Stripe-Signature header
Stripe does not sign with a static token you compare against. It signs each request freshly, so the signature is tied to both the exact payload and the moment it was sent. When Stripe delivers an event to your endpoint, it attaches a Stripe-Signature header that looks like this:
Stripe-Signature: t=1740000000,v1=5257a869e7...Two parts matter:
t=is the Unix timestamp (in seconds) when Stripe generated the signature.v1=is a hex-encoded HMAC-SHA256 signature.
Stripe builds the signed payload by joining the timestamp and the raw request body with a period:
signed_payload = t + "." + raw_bodyIt then computes HMAC-SHA256(signed_payload, signing_secret) and puts the result in v1. The header can carry more than one v1 value during a secret rotation, so treat the scheme as a comma-separated list rather than a fixed string.
You may also see a v0 value. The only valid live signature scheme is v1; for test mode events, Stripe adds an extra signature with a fake v0 scheme to help you test parsing. Ignore every scheme that is not v1.
Verifying the signature correctly
The verification itself fits in a few lines of pseudocode. Most failures come from feeding it the wrong inputs, not from the HMAC call.
1. read raw_body  = exact bytes of the request body
2. read header    = value of "Stripe-Signature"
3. parse header into timestamp t and one or more v1 signatures
4. signed_payload = t + "." + raw_body
5. expected       = hex( HMAC_SHA256(signing_secret, signed_payload) )
6. if no received v1 equals expected (constant-time): reject
7. if abs(now - t) > tolerance: reject
8. accept
Three inputs decide whether this works:
- The raw body. You have to hash the exact bytes Stripe sent. If your framework already parsed the JSON and you re-serialize it, key order and whitespace shift, the bytes change, and the HMAC no longer matches. A single re-ordered key or one extra space breaks the whole comparison. Capture the body before any JSON middleware touches it, usually by registering a raw-body reader on the webhook route only.
- The endpoint signing secret. This is the
whsec_...value shown for that specific endpoint in the Stripe Dashboard, or returned when you create the endpoint through the API. It is not your API key. If you are not sure which value you are holding, where to find your Stripe webhook signing secret walks through the exact click path and the keys it gets confused with. - A constant-time comparison. Compare the computed and received signatures with a constant-time function, not
==. An ordinary string compare can leak timing information about how many leading bytes matched.
Stripe’s official libraries wrap all of this in a single constructEvent / Webhook.construct_event call, and their webhook signature documentation covers the language-specific calls. If you verify by hand, the steps above are the whole contract.
The timestamp tolerance: stopping replays
Without the timestamp, anyone who captured one valid request could resend those exact bytes forever and the signature would still validate, because the payload never changed. Checking that t is recent turns a captured-and-replayed request into an expired one.
Stripe’s own libraries reject events whose timestamp falls outside a default tolerance of 5 minutes (300 seconds). See Stripe’s webhook signature documentation for the exact behavior and how to configure it. Five minutes is wide enough to absorb normal clock drift and network delay, and narrow enough that a stolen payload goes stale quickly. If you verify manually, apply the same window, and keep your servers on NTP so a drifting clock does not start rejecting legitimate events. Widening the tolerance to paper over skew is the wrong fix; it just hands an attacker a longer replay window. We go deeper on this trade-off in why a valid signature alone does not stop replays.
How to fix “No signatures found matching the expected signature for payload”
The full message from Stripe’s Node library reads:
No signatures found matching the expected signature for payload. Are you passing the raw request body you received from Stripe?It means the library parsed the Stripe-Signature header, computed an HMAC, and none of the v1 values matched. Only two inputs can be wrong at that point: the body bytes or the signing secret. Start with the body, because that is the cause most of the time.
The same function raises a handful of other messages. They are worth telling apart, because each points at a different fix:
| Message | What it means |
|---|---|
No signatures found matching the expected signature for payload | Header parsed fine, HMAC mismatch: wrong bytes or wrong secret |
Webhook payload must be provided as a string or a Buffer | Node only: you passed a parsed object. Recent stripe-node versions catch this case before comparing |
No stripe-signature header value was provided | The header never reached your code; a proxy or your framework dropped it |
Unable to extract timestamp and signatures from header | The header is there but mangled, or you passed a different header |
No signatures found with expected scheme | No v1= entry in the header |
Timestamp outside the tolerance zone | The signature is fine but older than 300 seconds; see the tolerance section |
That second row matters more than it looks. Pass req.body after express.json() and a current stripe-node says so plainly. So when Node gives you “No signatures found”, you are usually handing it a string that is no longer the original: JSON.stringify(req.body), a body decoded and re-encoded by a proxy, or a secret that doesn’t belong to this endpoint.
Read the raw body in your framework
Each framework has one correct way to get the bytes before anything parses them:
| Framework | Raw body | Signature header |
|---|---|---|
| Express | express.raw({ type: "application/json" }) on the webhook route, then req.body | req.headers["stripe-signature"] |
| Next.js App Router | await request.text() in the route handler | request.headers.get("stripe-signature") |
| Next.js Pages Router | export const config = { api: { bodyParser: false } }, then read the request stream into a Buffer | req.headers["stripe-signature"] |
| Django | request.body | request.META["HTTP_STRIPE_SIGNATURE"] |
| Flask | request.get_data() | request.headers["Stripe-Signature"] |
| FastAPI | await request.body() | request.headers["stripe-signature"] |
| PHP | file_get_contents("php://input") | $_SERVER["HTTP_STRIPE_SIGNATURE"] |
| Laravel | $request->getContent() | $request->header("Stripe-Signature") |
In Express, register the webhook route before any global app.use(express.json()), or the global parser consumes the body first:
app.post("/webhook", express.raw({ type: "application/json" }), (req, res) => {
  const event = stripe.webhooks.constructEvent(
    req.body, // a Buffer, untouched
    req.headers["stripe-signature"],
    process.env.STRIPE_WEBHOOK_SECRET,
  );
  // ... handle event ...
  res.sendStatus(200);
});
In the Next.js App Router, request.json() is the trap. Read the text once and parse it yourself after verification:
export async function POST(request: Request) {
  const rawBody = await request.text();
  const event = stripe.webhooks.constructEvent(
    rawBody,
    request.headers.get("stripe-signature")!,
    process.env.STRIPE_WEBHOOK_SECRET!,
  );
  // ... handle event ...
  return new Response(null, { status: 200 });
}
With Django REST Framework, read request.body before anything touches request.data. Once DRF has parsed the stream, reading request.body raises RawPostDataException.
The body is raw and it still fails: check the secret
- The secret has to be the
whsec_...value of the endpoint that sent this event. Every endpoint has its own signing secret, so two endpoints pointed at one handler fail about half the traffic. - Test mode and live mode never share a secret. A handler that passes every local test and dies on the first live event has the test secret in production.
stripe listenprints a secret of its own for the CLI session. Locally, use that one, not the Dashboard secret. The same applies when the CLI forwards into a Docker container: the container needs the CLI’s secret.- Look for whitespace. A trailing newline from a
.envfile or a secrets manager changes the key.stripe-nodeadds a note to the error when it spots whitespace in the secret.
Still failing with a raw body and the right secret? Then look at a proxy rewriting the body, clock skew, or a digest compared in the wrong encoding. All of those are in why webhook signature verification fails, which goes through all six in order.
A debugging checklist
Work through these in order and the mismatch usually surfaces fast.
- Reproduce with the Stripe CLI. Run
stripe listen --forward-to localhost:PORT/webhookand trigger an event. The CLI prints its own signing secret; use that one while testing locally, not your live endpoint secret. - Log computed vs received. Temporarily log the timestamp, the signed payload length, your computed signature, and the received
v1. If the lengths differ, your body is being mutated; if only the signatures differ, suspect the secret. - Check the content type and body capture. Confirm the request arrives as
application/jsonand that you read the raw body before any parsing middleware. In most frameworks that means registering a raw-body handler on the webhook route specifically. - Confirm the mode. Check that the event and the secret are both test or both live.
- Rule out the proxy. Compare the byte length your app sees against what Stripe delivered. If a proxy sits in front, make sure it forwards the body untouched.
- See the raw request first. If you are not sure what Stripe is actually sending, point the endpoint at a webhook tester for a minute: it shows the exact
Stripe-Signatureheader and the byte-for-byte body, which is what you are supposed to be signing. Paste yourwhsec_secret there and it checks the Stripe signature in the browser, so you know whether the secret or your code is the problem.
Offloading verification to a gateway
Signature verification tends to be written once and then copied into every service that receives events. Each copy is another place where raw-body handling can drift after a framework upgrade, and another secret to rotate. The work also multiplies per provider: the same idea arrives as a sha256= hex digest from GitHub and a base64 digest from Shopify, each with its own header and encoding. A webhook gateway runs the check in one place, in front of your application code.
On Webhooker, signature verification is part of every plan, including Free. A source configured with the Stripe preset holds the endpoint’s whsec_ secret and checks the Stripe-Signature header before a payload is accepted. The same check rejects any t= more than 300 seconds from the gateway’s clock. A request that fails is rejected at the gateway and never delivered; a request that passes is stored and answered with 200 OK before delivery starts.
Delivery to your service then runs out of band, at least once, off a durable queue. The retry schedule and replay page lists the attempts; deliveries that exhaust them land in a dead-letter queue with per-attempt history and can be replayed one at a time or in bulk. Plan limits that apply here: the Free plan covers 10,000 events a month with 14-day retention, Pro 100,000 events with 30 days, and Team 1,000,000 events with 90 days. Setup is described in inbound verification per source and the four-step quick start.
Testing the check without Stripe
You do not need the Stripe CLI, or a Stripe account, to exercise this code path. webhook-mock-sender builds a payment_intent.succeeded or invoice.paid event, signs it with your whsec_ secret exactly as Stripe does — t=<timestamp>,v1=<hex digest> over <timestamp>.<raw body> — and POSTs it to your endpoint. The same command with --invalid-signature --expect 400 proves the rejection path, and --timestamp-offset -600 --expect 400 proves the tolerance window is enforced. It is MIT licensed and runs locally, so the signing secret never leaves your machine.
Frequently asked questions
Can I skip verification because I am already on HTTPS?
No. HTTPS encrypts the connection, but it does not prove who sent the request. Your endpoint URL can leak, and anyone who learns it can POST forged events that look real. Signature verification is what proves the payload actually came from Stripe and was not altered in transit. Run the check in staging as well as production, so a broken verifier shows up before live events hit it.
How do I rotate the signing secret without downtime?
Roll the secret with a delayed expiry and make sure your verifier accepts every v1 value in the header, not just the first one. During the overlap Stripe signs each request with both secrets. The dashboard procedure, the expiry window, and the deploy sequence are covered in rolling the secret without dropping events.
Why does verification work in test mode but fail in live mode?
Almost always a secret mismatch: test-mode and live-mode endpoints have separate signing secrets, and it is easy to ship the test whsec_... to production by accident. Check that the secret in your live environment belongs to the live endpoint, and that you are reading the live-mode signing secret rather than a leftover CLI or test value.